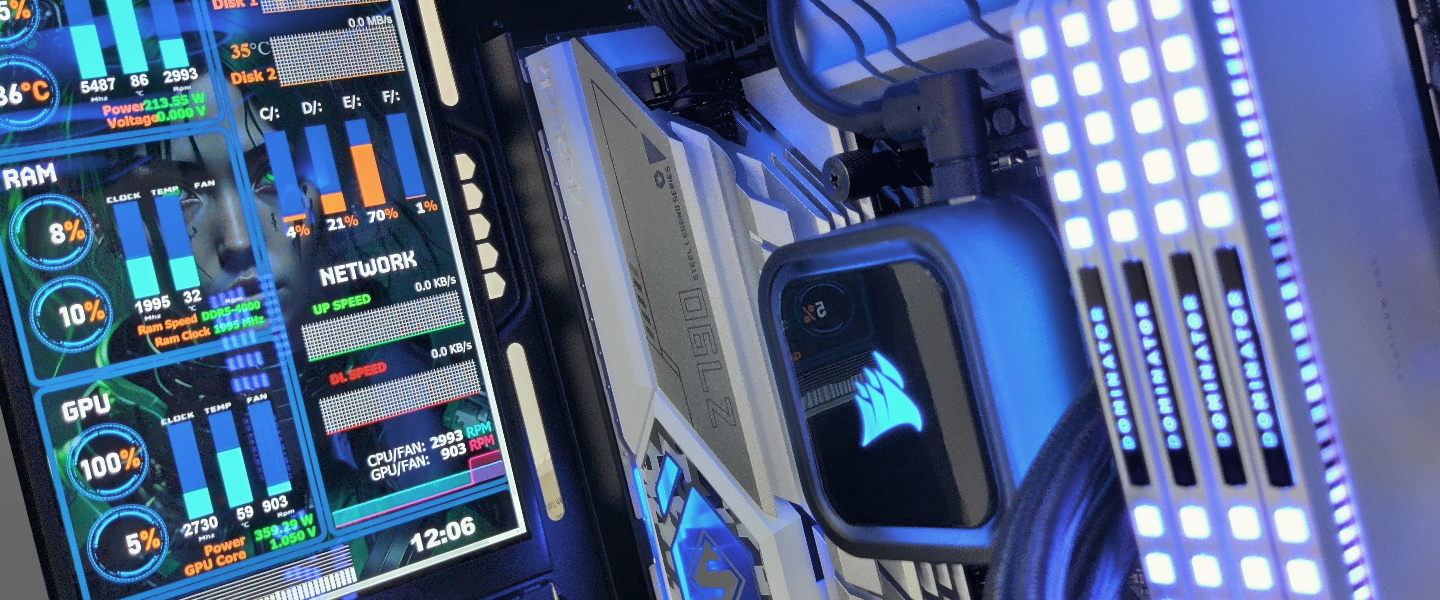
You might have seen pictures of Gaming PC around the web with fancy internal screens inside, the cool videos are often so eye-catching they're hard to miss! In this article we’ll be covering some of the ins-and-outs of getting these mini internal monitors displaying cool videos, slideshows and helpful system stats.
For our build in this article we're using a small internal display running at 1200(h) x 1920(w) resolution. It's just a regular display but small enough to fit the space, connecting via HDMI and powered by a USB Type-A connector which we've routed to the rear IO.
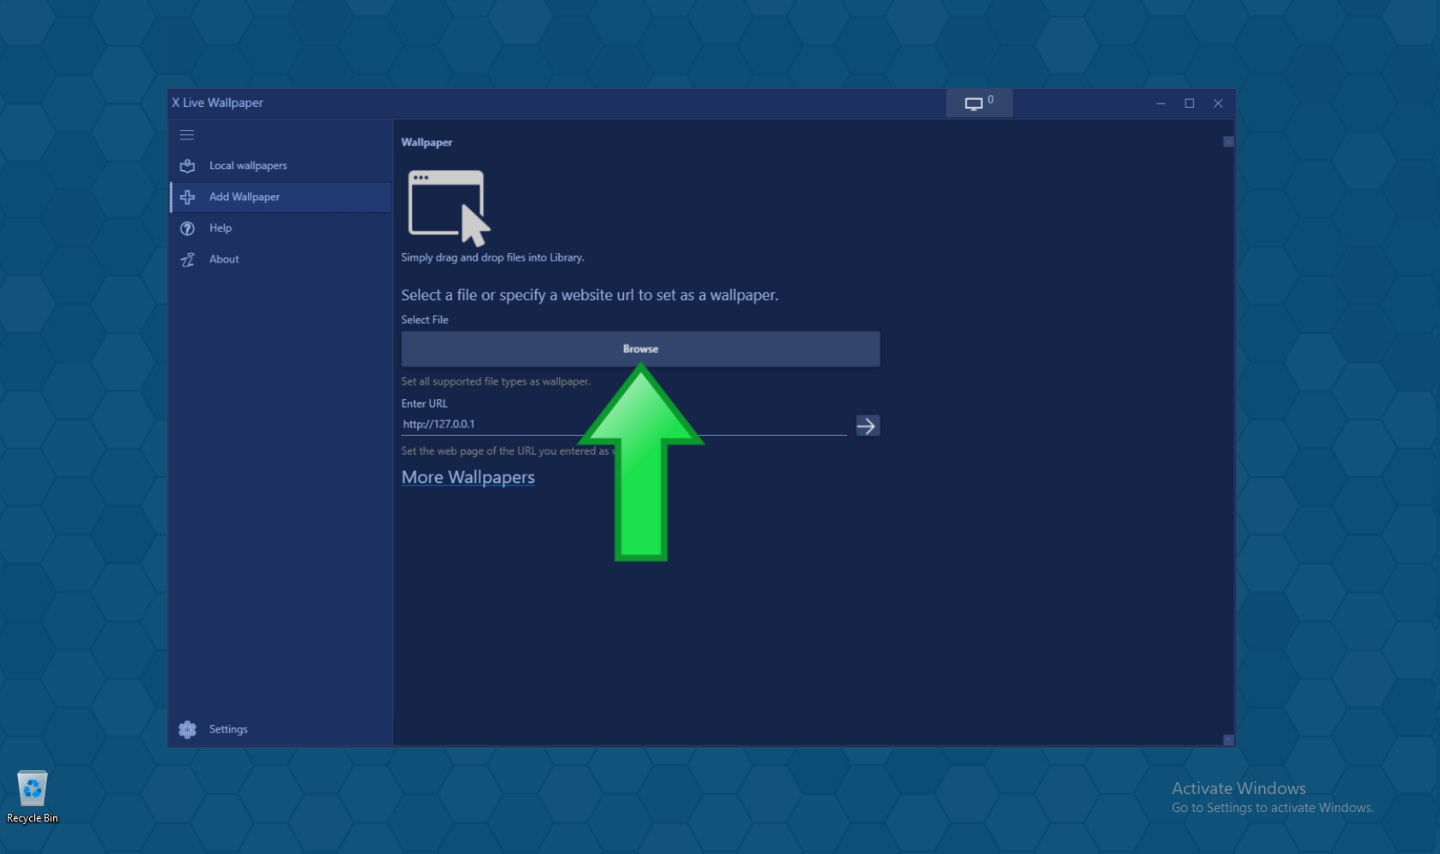
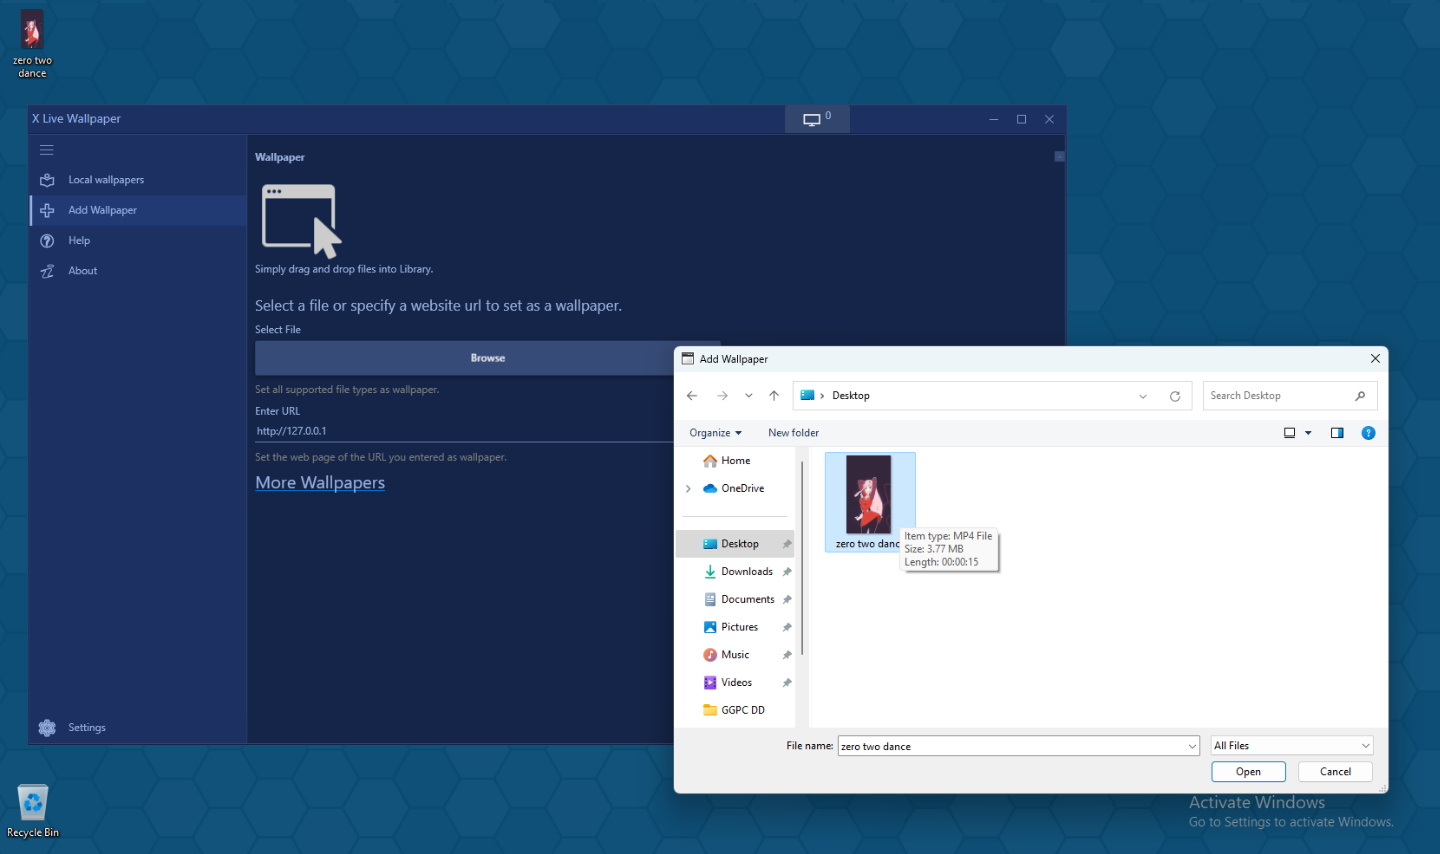
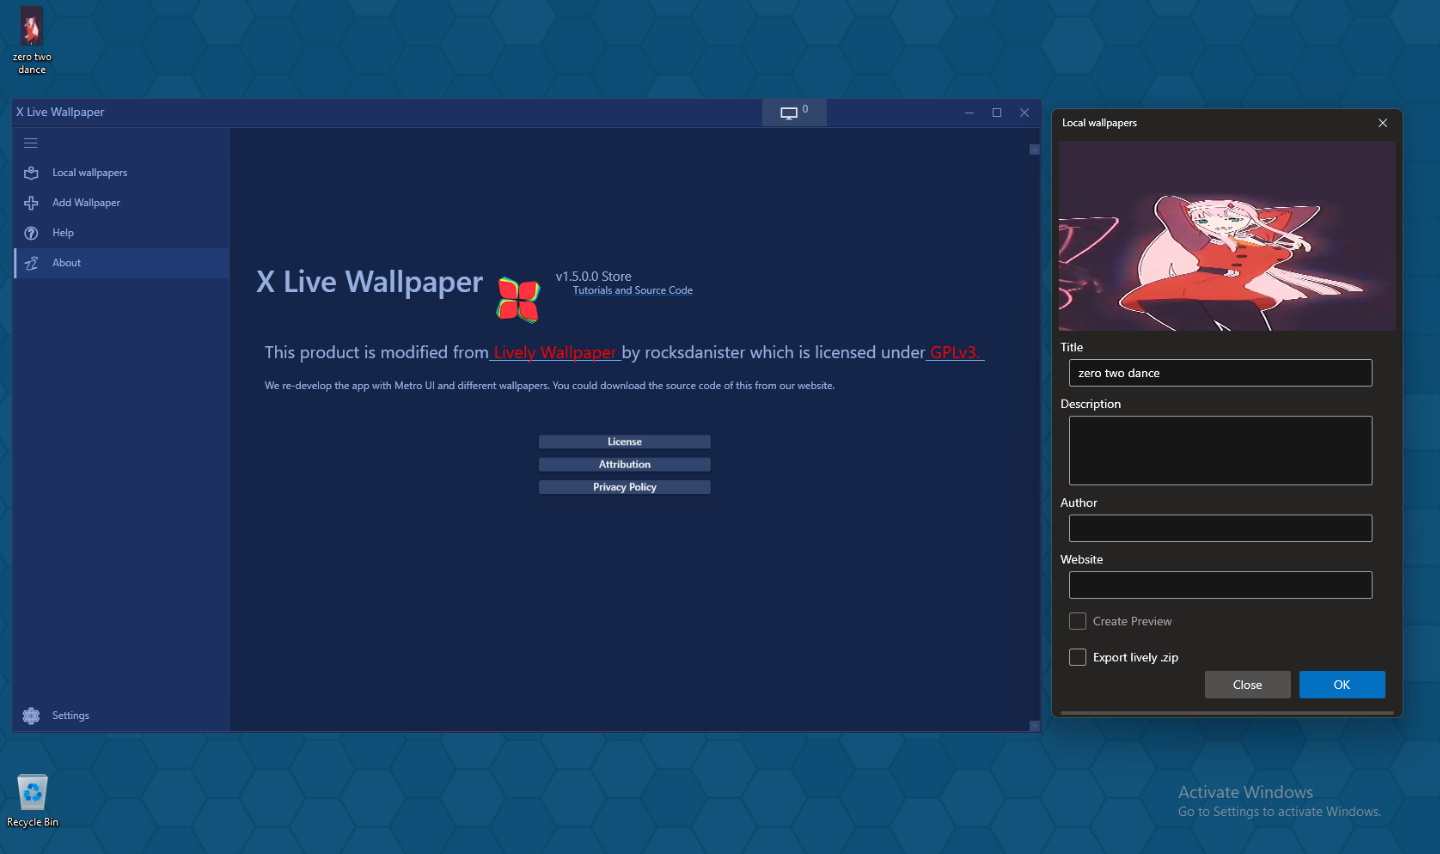
Starting things off, let's get our mini internal monitor displaying some cool videos. There is a bunch of neat options around for this, popular movie player VLC can be used for example, but an even easier way is by using LIVE WALLPAPER software, so we’ll use X Live Wallpaper APP which is available from the Microsoft store for free!
With this app installed you can then upload your own .MP4 video using the tool, and it will become a wallpaper that will auto-play in loop. The software can be setup to auto-run too, so it's great for those wanting to set-and-forget.
Jumping in a quick guide about how to set things up, the first step is super important – you need to select your internal screen!
To do this click the ‘screen’ button up top, the icon looks like a little monitor and is to the right hand side of the top menu in the X Live Wallpaper APP

That same APP can be used for photos too, so making slideshows is quick and easy, but how about system stats? This is a little bit more involved but the result is useful system information at a glance so well worth the time spent.
For our example I’ll be using popular tool AIDA64, which is available to download via www.aida64.com/downloads
There are paid versions and free versions, so we’ll be using the free trial version named AIDA EXTREME for our example below.


Clicking the link will download aida64extreme688.exe (that 688 is the version number, depending on when you read this there might be a new version), by default this will go to your downloads folder, double click to install and follow the prompts.


Now that we've installed the AIDA64 software, it's time to customise our settings and choose what system stats we're wanting to display. This is a little complicated the first few times but once you've got your template, adding more is very easy. After all the information is loaded we'll spend some time customising the colours so it looks cool it, but for now let's just use text.


There are so many options, so it's best to use the search box to find what you want stats for, as below I choose GPU temperature, GPU utilization, CPU temperature, CPU utilization and RAM utilization in my example. Use the little D-PAD to arrange the elements on your screen space, double clicking an element in the menu will allow you to customise fonts. Once you are finished, click apply. This will create a website URL we can use to show the stats on our display!


And we're all set! The trail version is limiting, but you get the idea, and if you dive into the AIDA64 forums there are also many cool templates that users have made already, or you can download the assets for our example here and have a play. Have some fun and see what you can do, it’s a fully functional mini monitor after all!


